
Lower Back Pain Stretches and Exercises You Can Do at Home
Do you deal daily with ongoing back pain? With four out of five people experiencing some form of pain in their back at some point in their life, it’s absolutely vital that you’re informed on how to help yourself manage discomfort and improve mobility.
While professional treatments such as physiotherapy are invaluable for long-term wellness, there are also a number of lower back stretches and exercises you can do all by yourself (or with the help of a friend) at home.
What causes lower back pain?
Before we get into the details of how to go about managing your back pain troubles, you should know about some of the contributing factors that actually cause this discomfort. Lower back pain can stem from many places, but there are a few that are more common than others. Often-reported causes for lower back pain include:
Trauma to the spinal structure, often from car crashes, falls, sports injuries, etc.
Muscle injuries, especially from lifting with improper technique
Longtime poor posture, particularly slouching
Wear and tear related conditions, such as degenerative disc disease
Osteoarthritis in the spine
Although some of these contributors are more severe than others, all of them can be helped with some basic at-home stretches and exercises. Given enough time and consistency, these exercises can absolutely mean the difference between a life of pain and the life you love. So consider doing one or more of this handful of stretches and routines at home to reduce lower back pain.
1. Cat and cow pose
This is an amazing mobilization for anyone who’s dealing with pain in their lower back. It’s also a fairly mild exercise, meaning that basically anyone able to get down on their hands and knees can do it!
The routine itself is simple. First, get on your hands and knees (do this on a carpet or yoga mat; it’s not recommended to do it on a hard surface) with your hands squarely under your shoulders, and your knees aligned below your hips.
To start, your back should be nice and straight. Begin by slowly arching your back upwards, as if you’re trying to get your bellybutton as far from the floor as possible. There should be a nice curve to your spine from your shoulders to your hips. Then slowly release the stretch, and let your abdomen move down, sagging past your shoulders and curving towards the floor.
Repeat this movement five to ten times, being sure to take your time in each position and breathing deeply throughout.
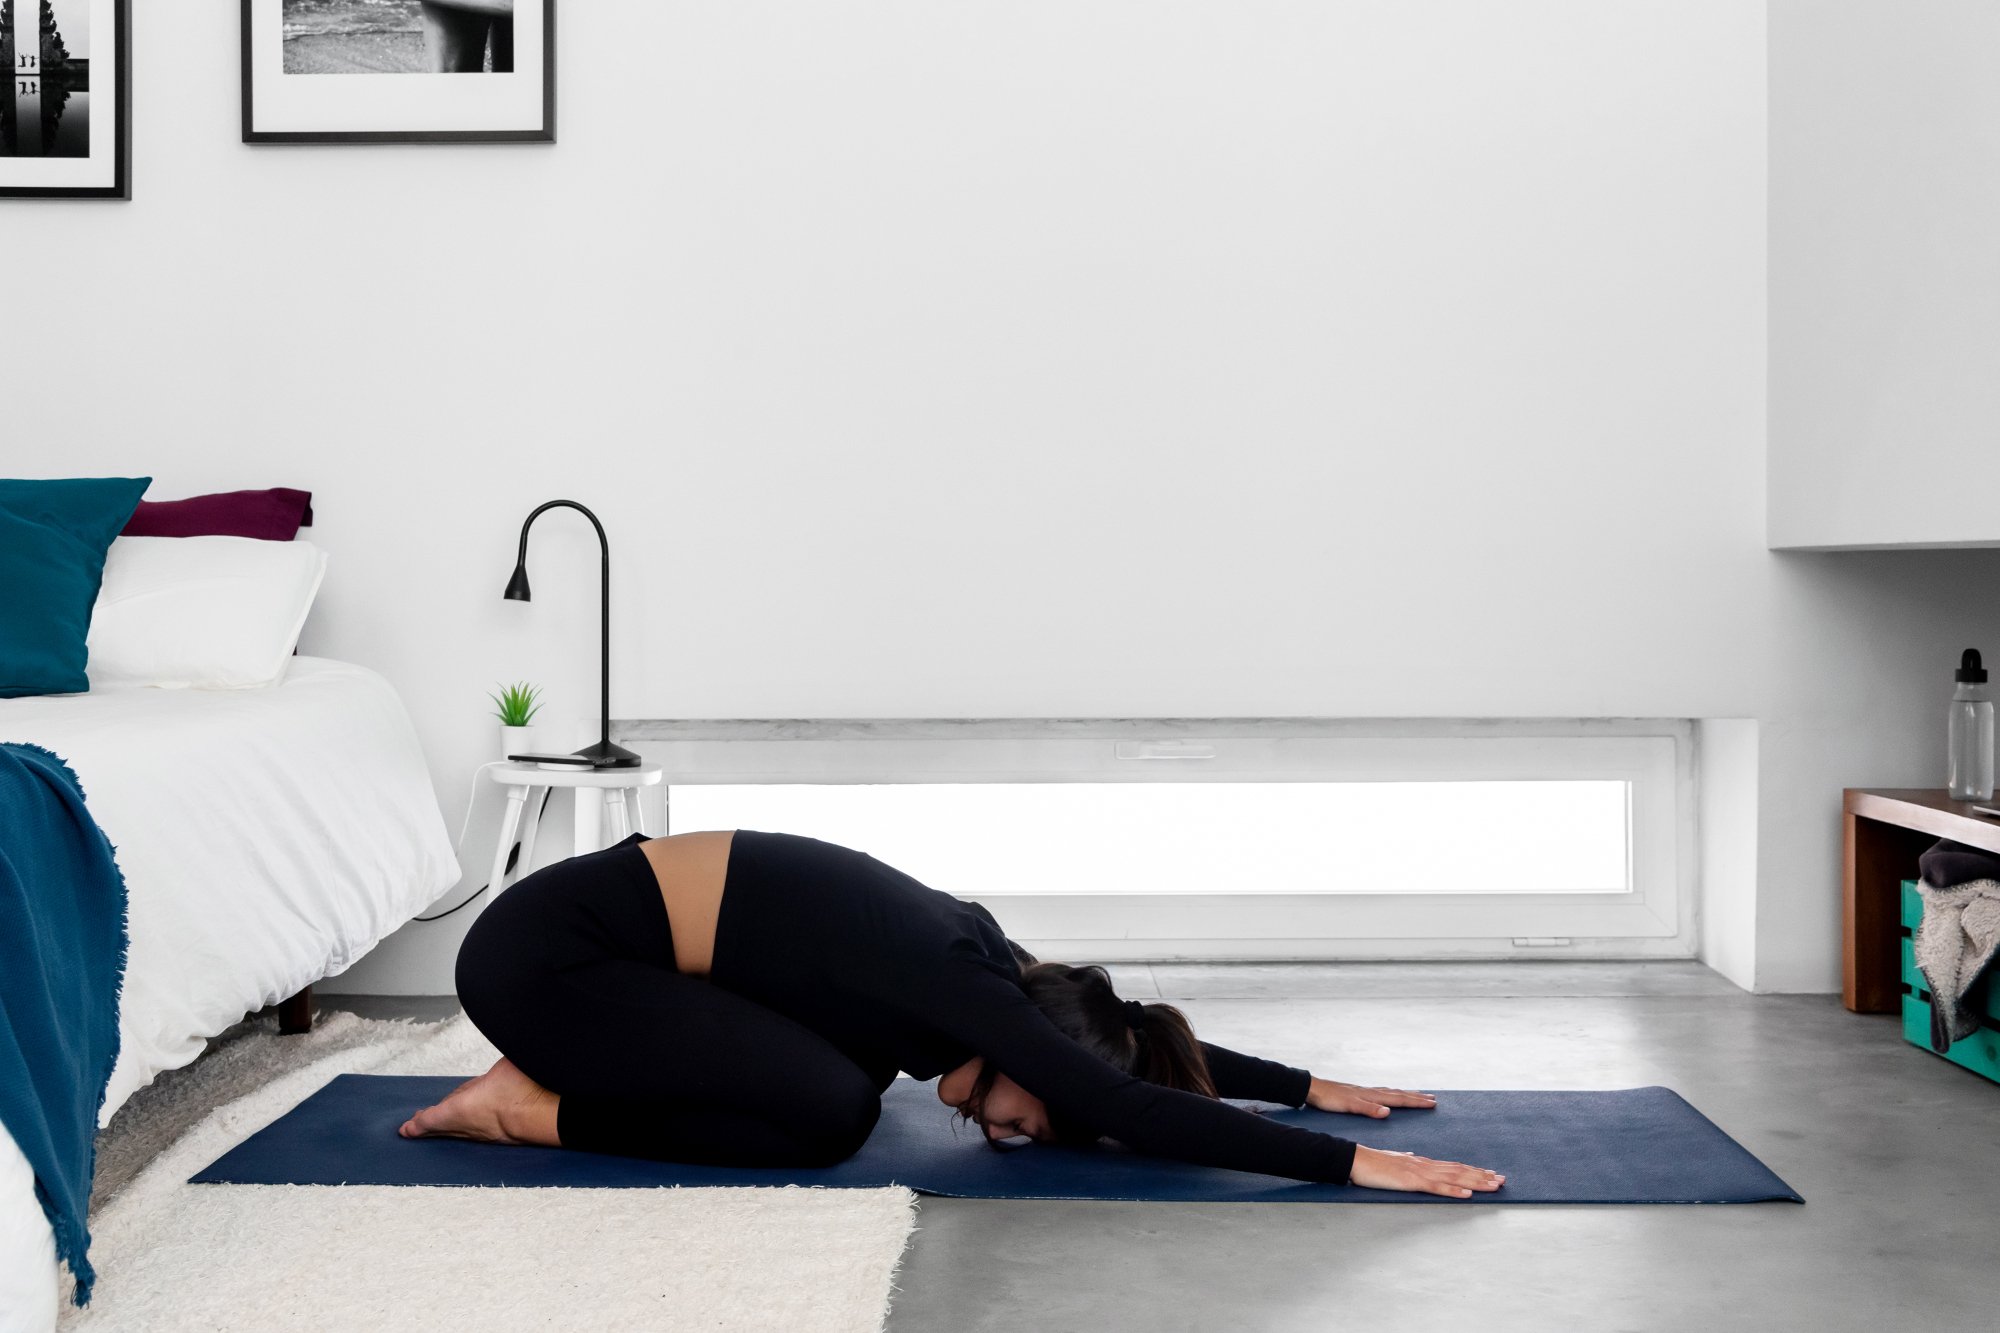
2. Child’s pose
This yoga pose is a great way to gently relieve some pressure from your spine, especially if it’s been a long day on your feet or at a desk. Start by kneeling on the floor, with your ankles beneath your hips. Your knees should be pointing outwards slightly, rather than pointing straight forward. Then, using your hands to support your upper body, begin to bow down. Your goal is to touch your forehead to the floor while keeping your hips as low to the floor as possible.
Extend your arms out to the floor in front of you to deepen the stretch, with your palms down. You can optionally pull yourself forward slightly with your hands to lengthen your spine even more. Hold this pose for at least thirty seconds, or up to a minute, taking deep, controlled breaths throughout.
3. Knee-to-chest stretch
Low back pain can gradually often go hand in hand with tightness and pain in your hips and glutes, which can in turn make your back even more painful and tight. This stretch is a nice and easy way to relieve some of this tension and help the muscle groups around your low back relax.
To perform this stretch, lie on the floor on your back, with your knees bent and your feet flat on the floor. This position is called crook lying.
You’ll then want to grab one knee with both of your arms and slowly pull it to your chest. Everyone’s range of motion is different, so be sure to pull far enough to feel a gentle stretch in your low back while being careful not to overdo it and injure yourself.
Hold this stretch for thirty seconds to a minute, being sure to continue breathing, then return to the starting position. Repeat with the other leg, and then once more again on each side.
4. Spinal rotational mobility
This is another great mobilization for helping to relax the low back, and reduce back pain severity.
Starting in the same crook lying position as the previous stretch, keep your shoulder blades flat against the floor and slowly roll both knees over to one side of your body.
This twisting motion can be a bit painful for people already dealing with low back pain, so take it very slowly.
Once you’ve rolled them comfortably to one side where you feel tension on the spine then return to the starting position. Repeat on the other side, and repeat the whole routine five to ten times.
5. Cobra pose spinal mobilization
If you’ve ever dealt with low back pain, you know how painful the feeling of compression and a lack of space can be in the lumbar region of your spine. This cobra pose is a little bit more intense, but it's a great way to decompress your spine and get quick relief from back pain.
Start by lying face down on the floor, with the palms of your hands flat against the floor right underneath your shoulders. Take a deep breath in, and then slowly push your upper body up while being sure to leave your hips against the floor.
Keep raising your upper body, almost as if you’re doing a sloppy push-up. Come up as far as you comfortably can, stopping if there is a pinch or pain in your low back, and making sure your hips are still on the floor (meaning your spine will be curved, almost like a cobra with its head extended).
Once you’ve reached the top of the stretch, exhale, and relax your glute muscles in order for your spine to sag down. Once you’ve fully exhaled and your lower spine has dropped down towards the floor, gently relax your arms and return to the starting position. Repeat the exercise five to ten times, once or twice a day.
It’s normal for the first few repetitions of this exercise to be a bit painful. Listen to your pain, and lower down once you feel discomfort in your back. Pause and repeat the movement. If you do it correctly, each one will be a little bit less uncomfortable, and your spine will thank you when you’re done!
6. Bridge exercise
Another exercise for the low back, the bridge exercise is great for engaging key muscles that support the stability of your lumbar region. Starting in the same crook lying position as with previous exercises, engage your core and glute muscles to gradually raise your pelvis off the floor. Keep your weight in the heels of your feet, and do not lift your toes off the floor.
Be sure to keep your shoulders and head as relaxed and close to the floor as possible as you push your hips upward. You should be trying to achieve a straight, diagonal line extending from your knees all the way to your shoulders.
Once you’re at the top of the exercise, try to hold it for the duration of three or four deep breaths. Then gently lower your hips, returning to the starting position, and repeat the exercise ten times. You can pause after the first set and repeat a second set of ten if you have time.
Need more tips? We can help
These are just some of the exercises you can start doing at home to relieve yourself of low back pain, discomfort, and limited mobility. If you need more suggestions for work you can do yourself to fix these problems, or if you’d like to get an expert to guide you through the process of engaging your core muscles, or provide a thorough assessment to determine the specific cause of your lower back pain, Triumph Physio can help.
Contact us today, and learn how we can help get you on the road to recovery!
Creative Commons Attribution: Permission is granted to repost this article in its entirety with credit to Triumph Physio and Wellness and a clickable link back to this page.